Visit our web site

Visit our web site: Forbidden Fruits Farm to get directions to the farm, order beef, order non-gmo feed, and learn about what we are doing.

Monday, June 24, 2013

7 Days, 7 Kale Recipes: Day 4 — Kale, Sausage, and Kasseri Frittata

Day 4: Kale, Sausage, and Kasseri Frittata


Kasseri is a Greek sheep's milk cheese that, when aged, is comparable to Parmesan cheese. If you can't find Kasseri, use Parmesan cheese.

What You Need:

  • Saute pan with oven-safe handle
  • One recipe of cooked brown rice (2 c. water, 1 c. brown rice, 1 tsp. salt, 1 Tbsp. olive oil)
  • 1 lb. sausage
  • 1/4 cup milk
  • 1/3 lb. grated Kasseri cheese (or Parmesan is fine)
  • 10 eggs
  • 1 cup milk
  • 1/2 cup heavy cream (or half and half)
  • 2 Tbsp. coconut oil (or use olive oil)
  • 1 medium bunch kale, cleaned with center stems removed
  • 1 1/2 tsp. salt
  • 1/2 tsp. pepper


How to Prepare:

  1. Make 1 recipe of brown rice (1 c. rice, 2 c. water, 1 t. salt, 1 T. olive oil). Or make twice as much rice the next time you make rice, then use the leftover rice. You can use white rice here if you don’t have brown. Brown just makes it nuttier and crunchier.

  2. Brown the sausage, drain any excess grease, and set meat aside.
  3. Mix all rice with 4 whisked eggs, 1/4 c. milk, 1/2 c. grated kaseri cheese. If you don’t have kaseri (which is a sharp Greek cheese, use Parmesan).
  4. Over medium to medium-low heat, heat 2 T. coconut oil. Swirl pan to coat sides with coconut oil so frittata doesn't stick. I use a non-stick saute pan with two handles. I pretty much reserve this pan for frittatas and I only use a spatula, not a knife to cut the frittata, so it never gets scratched up.
  5. Press rice mixture into the bottom and sides of a saute pan (I use one with 2 handles because it fits better under the broiler and looks nicer on the table). If you have a non-stick saute pan, use it. If you don't, use a liberal amount of coconut oil up the sides or you won't get to enjoy the delicious crunchy brown rice crust because it will adhere to the pan and you'll have to soak it off later.Heat rice mixture for 15-20 minutes, until the edges of the rice are starting to brown against the pan. Be sure heat is not so high that you burn the rice.
  6. Clean a medium bunch of kale, washing, removing thicker stems. Steam in 2 cups water with 1 t. salt in a dutch oven for 6-10 minutes depending on how young or tough the leaves are. Drain leaves in collander. Spin in salad spinner or pat dry on paper towels so leaves are not wet for the next part. Place leaves over rice crust so all crust is covered.
  7. Arrange browned sausage over the kale.
  8. Mix 6 eggs with the rest of the grated cheese, 3/4 cup milk, 1/2 cup heavy cream (or half and half for the faint of heart disease), 1 1/2 t. salt, 1/2 t. pepper. Pour egg mixture over leaves. 
  9. Continue to heat on medium/medium-low for 10 minutes. Move pan to directly under broiler on high until top is nicely browned (~8 minutes -- this will depend on how close to the broiler the pan sits and how hot your oven is).
  10. Jiggle pan at this point. If egg mixture jiggles, set oven to 350, move pan to center of oven, and bake for an additional 8-12 minutes, until frittata is slighly puffy and just barely jiggles. It will continue to cook when you pull it out of the oven.

    Frittata with Ramen Napa Cabbage Sald


Sunday, June 23, 2013

Roasted Garllc with Blue Cheese

Just because I am busy making and posting 7 kale recipes in 7 days doesn't mean I don't have time for some delicious roasted garlic. I used to make this recipe years ago (before the Internet) as an appetizer. I forgot all about it, then I started harvesting our all-natural garlic, and I thought to myself, we are going to have to find ways to eat more than a couple cloves per day!

We are happy to sell you our garlic as loose garlic or in braids, but we only sell the pretty garlic. The ugly garlic we keep for ourselves, and man, oh man do we have a lot of ugly garlic!

This recipe is great because even people, like my husband, who really don't like "garlicky food," like this recipe. Also, it uses four or five heads of garlic at once!

Roasted Garlic with Blue Cheese

What you need:

  • small oven-safe pan that also looks good for serving
  • 4 or 5 heads of garlic
  • 2 Tbsp. butter
  • 1 can of chicken broth
  • 1-2 oz. blue cheese (does not have to be Roquefort)

How to prepare:

  1. Preheat oven to 375 degrees.
  2. Cut the roots and the top 1/2 inch or so off each head of garlic. Ideally, all the cloves will be partially cut open.
  3. Arrange garlic heads in an oven-safe pan that is also something you don't mind bringing to the table.
  4. Pour chicken broth into pan, up to the top of the garlic head. You might not need an entire can of broth.
  5. Dot top of head with 1 Tbsp. of butter, divided among the heads. Save remaining butter.
  6. Bake for 30 minutes, uncovered.
  7. If necessary, add additional chicken broth to bring level of broth up to top of garlic heads. Dot garlic heads with remaining butter.
  8. Bake for an additional 35 minutes uncovered.
  9. Sprinkle blue cheese on and around garlic. Bake an additional 10 minutes, uncovered. About the blue cheese ... I love Roquefort, but it is wasted on this recipe. The garlic is the star of this recipe, so just get whatever blue cheese or crumbled blue you can find at your grocery store and save the good stuff for a recipe where it really matters.
  10. Each clove has to be squeezed or pressed out of its wrapper. Spread contents of each clove on crusty bread. Dunk break into liquid or use a spoon to pour chicken broth mixture over bread. This dish is actually easiest to eat if each person gets half a head, then uses their fingers to squirt the contents of each clove onto the bread, but if you are at a no-fingers-in-the-food event, you can press the roasted garlic out of the skin using a knife to hold the clove in place and a fork to push the roasted garlic out of the clove.

7 Days, 7 Kale Recipes: Day 3 — Kale, Potato, and Cheddar Bake

Day 3: Kale, Potato, and Cheddar Bake

This dish ought to be a side dish, but I promise you, if you have leftover sitting around, you'll end up making a meal out of it. It is really delicious. It is better the second day, if it makes it that long, because the garlic has a chance to meld with the potatoes and kale.
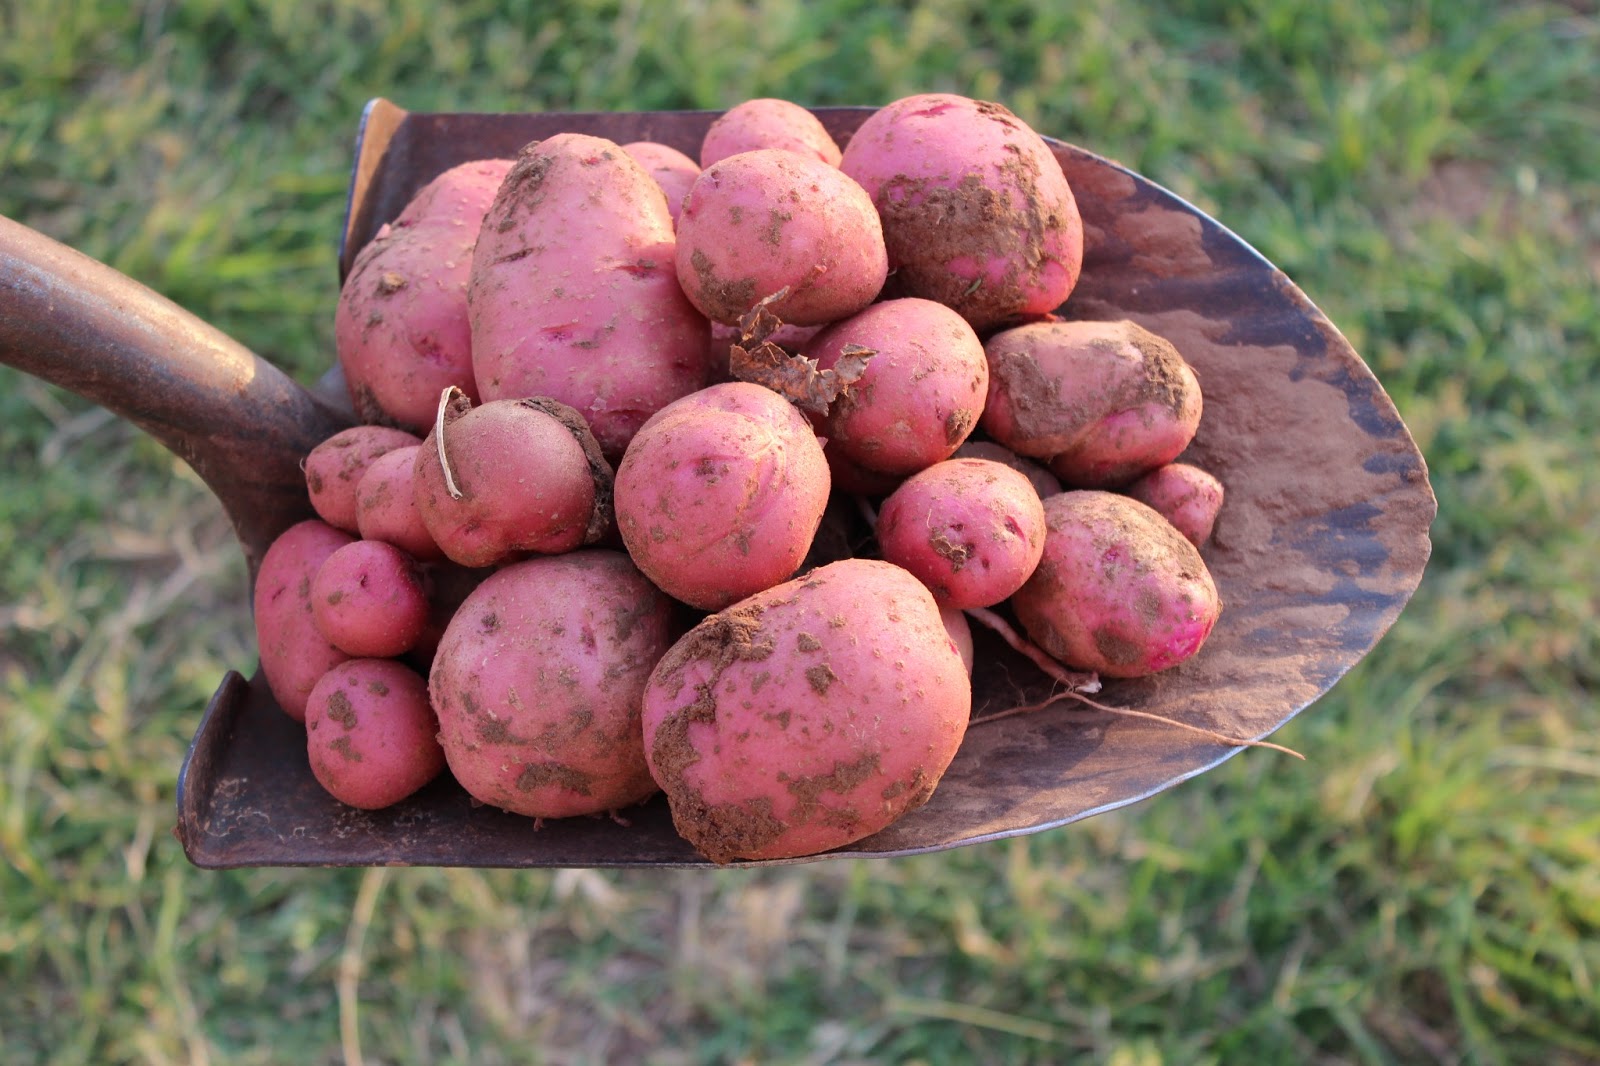
The potatoes are finally ready to harvest! This are our first of the season. How great to have  potatoes and kale and garlic all ready at the same time!

What you need:


  • Medium-sized casserole dish
  • 5 medium red potatoes, washed, but not peeled
  • 2 Tbsp. butter
  • 4 cloves garlic, finely diced
  • 1 large bunch kale
  • 1/2 lb. sharp cheddar cheese, shredded
  • salt
  • pepper

How to prepare:

  1. Preheat oven to 350 degrees.
  2. Butter or spray sides and bottom of a medium-sized casserole dish.
  3. Slice the potatoes into approximately 1/4" thick slices.
  4. Arrange potato slices on the bottom of the casserole dish. Sprinkle diced garlic over potatoes.
  5. Cut butter into slices, then quarter each slice and dot the tops of the potatoes with the pieces of butter. Sprinkle with salt and pepper. 
  6. Bake potatoes for 45 minutes.
  7. Prepare kale by washing, removing ribs, and cutting or tearing into 2" pieces. 
  8. Boil kale in 2 cups water with 1 tsp. salt for 6-10 minutes.
  9. Drain kale in colander, saving liquid for later consumption, if desired. Spin kale or pat dry with paper towels to remove excess moisture.
  10. Layer kale over potatoes.
  11. Sprinkle cheddar cheese over kale.
  12. Bake for 15 minutes until potatoes are soft and cheese is all melted. Serves 6.
 Tomorrow: Day 4 — Kale and Kaseri Frittata

Did you miss Day 1: Kale Lasagna?
Did you miss Day 2: Disappearing Kale Chips?

Saturday, June 22, 2013

7 Days, 7 Kale Recipes: Day 2 — Disappearing Kale Chips

Day 2: Disappearing Kale Chips


Even my 16-year old daughter, who won't eat any vegetables other than the Romaine lettuce in Caesar salad, sweet corn. pickles, and olives loves kale chips!

We took some produce to the Lawton Farmer's Market this morning, and we had quite a bit of kale leftover, and all the way home, my daughter reminded me to make her kale chips today.

What you need:

  • Baking sheet
  • Cooling racks (2)
  • Gallon zip-top bag
  • Kale (1 bunch makes 2-3 trays of chips) 
  • 2 tsp. olive oil for each loosely filled gallon bag of prepared kale
  • Sea salt

How to prepare:

  1. Wash kale. We grew Red Russian Kale, so our kale has a lot of red in it. Yours might not look exactly like this.


  2. Remove stems all the way up into the leaves.
  3. Cut into roughly 2" pieces.
  4. Spin in a salad spinner to dry or pat dry with paper towels.
  5. Half fill a gallon zip-top bag with kale pieces.
  6. Drizzle 2 tsp. olive oil over kale in bag. Shake bag to coat leaves with olive oil.
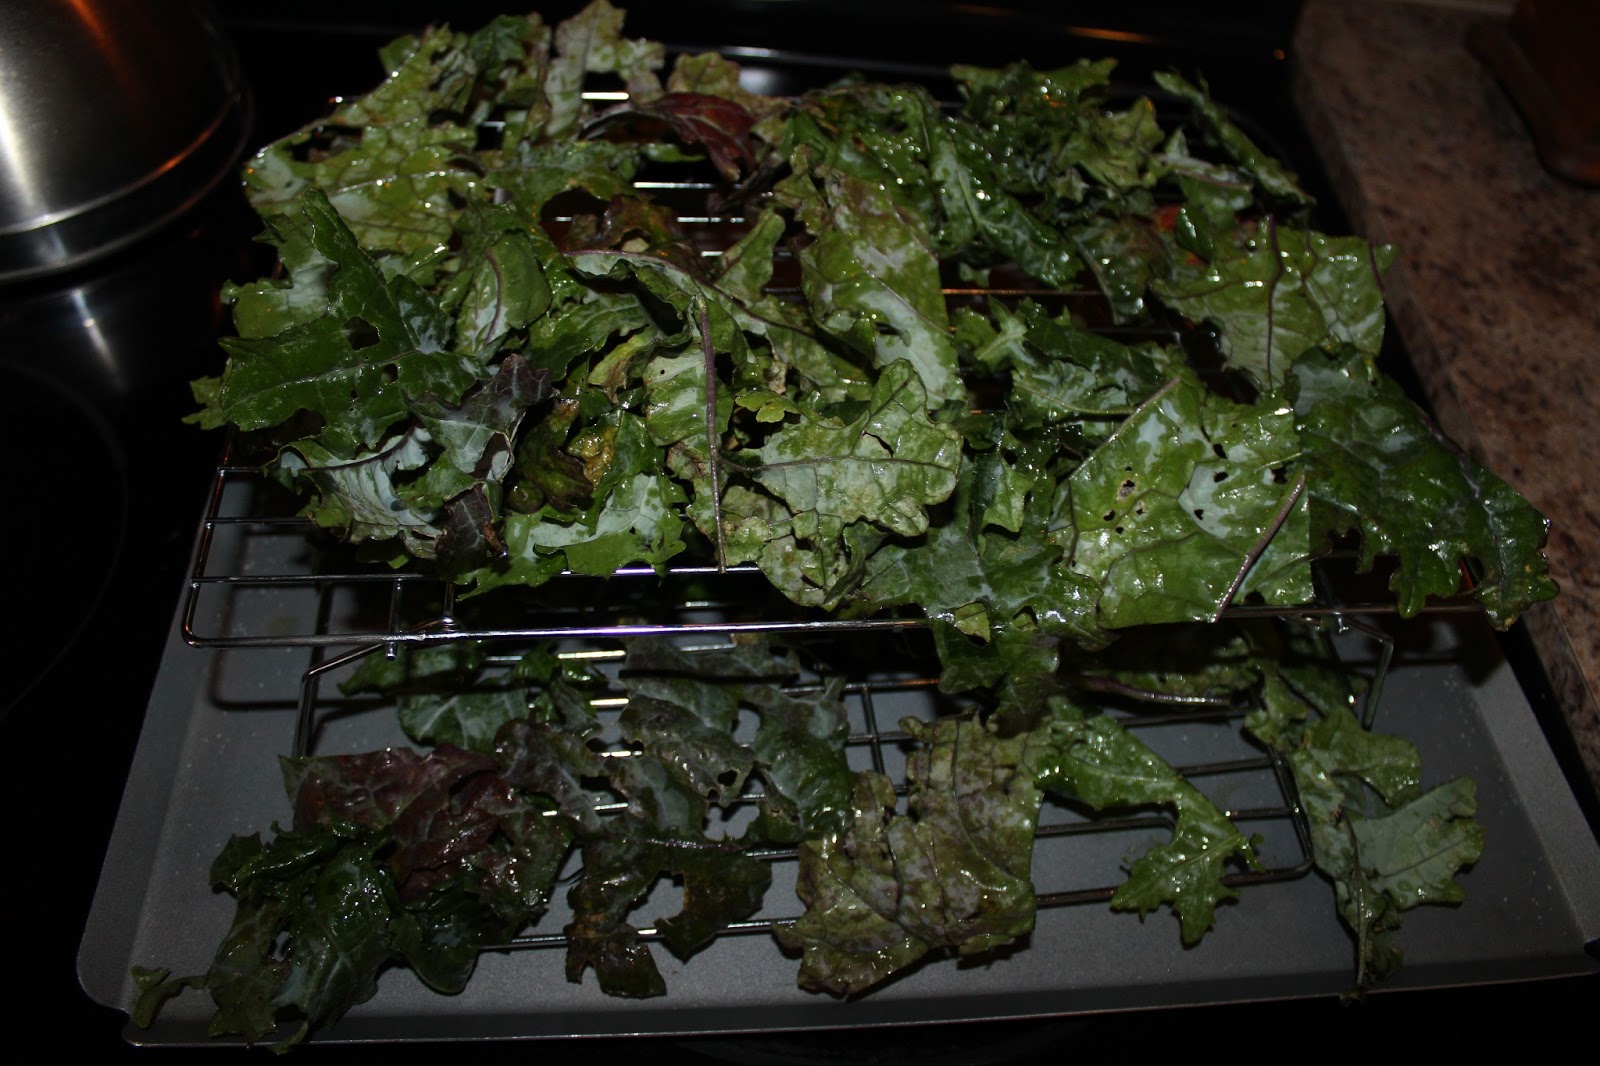
  7. Place one cooling rack on cookie sheet. Arrange kale on cooling rack. Salt to taste with sea salt. If you have a taller cooling rack you can just put the second rack on the same baking sheet, otherwise use two baking sheets. By putting the kale on cooling racks, you avoid having to turn the kale leaves over half way through baking.
  8. Bake at 275 degrees for 24 minutes.
    You can see they shrink a lot in cooking.
  9. Eat pretty much right away. They don't store well. 
Tomorrow: Day 3: Kale, Potato, and Cheddar Bake

Did you miss Day 1: Kale Lasagna?

Friday, June 21, 2013

How Do I Love Kale? Let Me Count the Ways (Day 1: Kale Lasagna)

If there is a fad, you can be bet I will miss it entirely. You know how stick-straight hair came into style in the nineties? I just figured out how to straighten mine about a year ago. My kids joke that when it comes to fads and pop culture, talking to me is like talking to a visitor from another planet. In fact, if I appear to be ahead of a trend, it is probably because I just caught onto it from thirty years ago, when it was last in style.

That said, I have been reading that Kale is a big fad right now, and the trends I do keep up on are food trends -- well, sorta, anyway.

I never grew up eating Kale. Kale is a cold-weather vegetable, and growing up in a Greek family, we mostly ate the vegetables that grow in Greece -- the vegetables that are commonly found in Greek cooking. My older brother's family is unusually health conscious, when it comes to food. My nephew told me three years ago that he loves Kale juice, which, it turns out my brother makes every Saturday morning for the family.

I am not sure I had ever heard of someone raving about Kale before that. Note: my nephew was about 9 years old at the time. Fast forward about 3 years and I am buying seeds for our garden. I think: "Kale! We should be eating that!"

So, now, my cup runneth over with Kale, and I have been busy figuring out what to do with Kale. All this cooking hasn't left me much time to post, but to make up for it, I will be posting 7 Kale recipes in 7 days!

My Philosophy of Cooking...
I am going to take a moment to tell you my philosophy about cooking, which, if you choose to embrace, will make cooking so much more enjoyable for you. Cooking should be fun ... relaxing. Beware of recipes that insist you use, for example, a certain brand of butter. Those recipes seem to me to be more about the creator and less about the food. That said, I am inclined to tell you which cheese, for example, I use, but if you don't have that cheese, use what you have or what you can find. I'm sure it will still be delicious, and then it will be your recipe! And that is all part of the fun of cooking! Don't obsess over the little things, like the brand of butter. Honestly, I don't have any friends who would be impressed if they knew what butter I was using. Do you? If something is absolutely crucial to the recipe, I will tell you, otherwise, don't feel guilty if you have to improvise or substitute ingredients.

Day 1: Kale Lasagna

This is WAY better than regular lasagna, in my opinion. Of course, I am not a huge pasta fan. It is not a big part of Greek cooking ... so there you go!

What you need:

  • Casserole pan or lasagna pan
  • 1 large head of kale
  • 1 lb. sausage
  • 3/4 lb. mozzarella cheese, shredded
  • 1/4 c. shredded Parmesan or Romano cheese
  • 1 jar of your favorite pasta or pizza sauce (read the ingredients and look for things you recognize, if you don't have a favorite)

How to prepare:

  1. Butter or spray a medium-sized baking dish (if you use a large lasagna pan, just double all the ingredients).
  2. Preheat oven to 350.
  3. Prepare the kale.
    Preparing Kale ...
    All Kale pretty much needs to be prepared the same way before you can start cooking it. These same steps apply to all the recipes on this site:
    A. Wash kale well.

    B. Cut out the stems. I find the easiest way to do this is to fold the leaf in half and cut out the stem from both sides at once.

    C. Chop or tear kale into roughly 2" pieces.

  4. Bring a dutch oven or large pot with about 3" of water and 1 tsp. salt to a boil. Add kale and reduce heat to simmering. Cook for 6-10 minutes depending on how tough the kale is. I find my fresh-from the garden kale only needs 6 minutes.

  5. Strain kale in a strainer in your sink. If so inclined, save the water to drink as a tonic. The water from boiled kale is reputed to have many health benefits.
  6. If you have a salad spinner, spin the kale to remove additional moisture. If not, squeeze kale in paper towels to dry out some.

  7. Layer the kale over the bottom of your baking dish or lasagna pan.

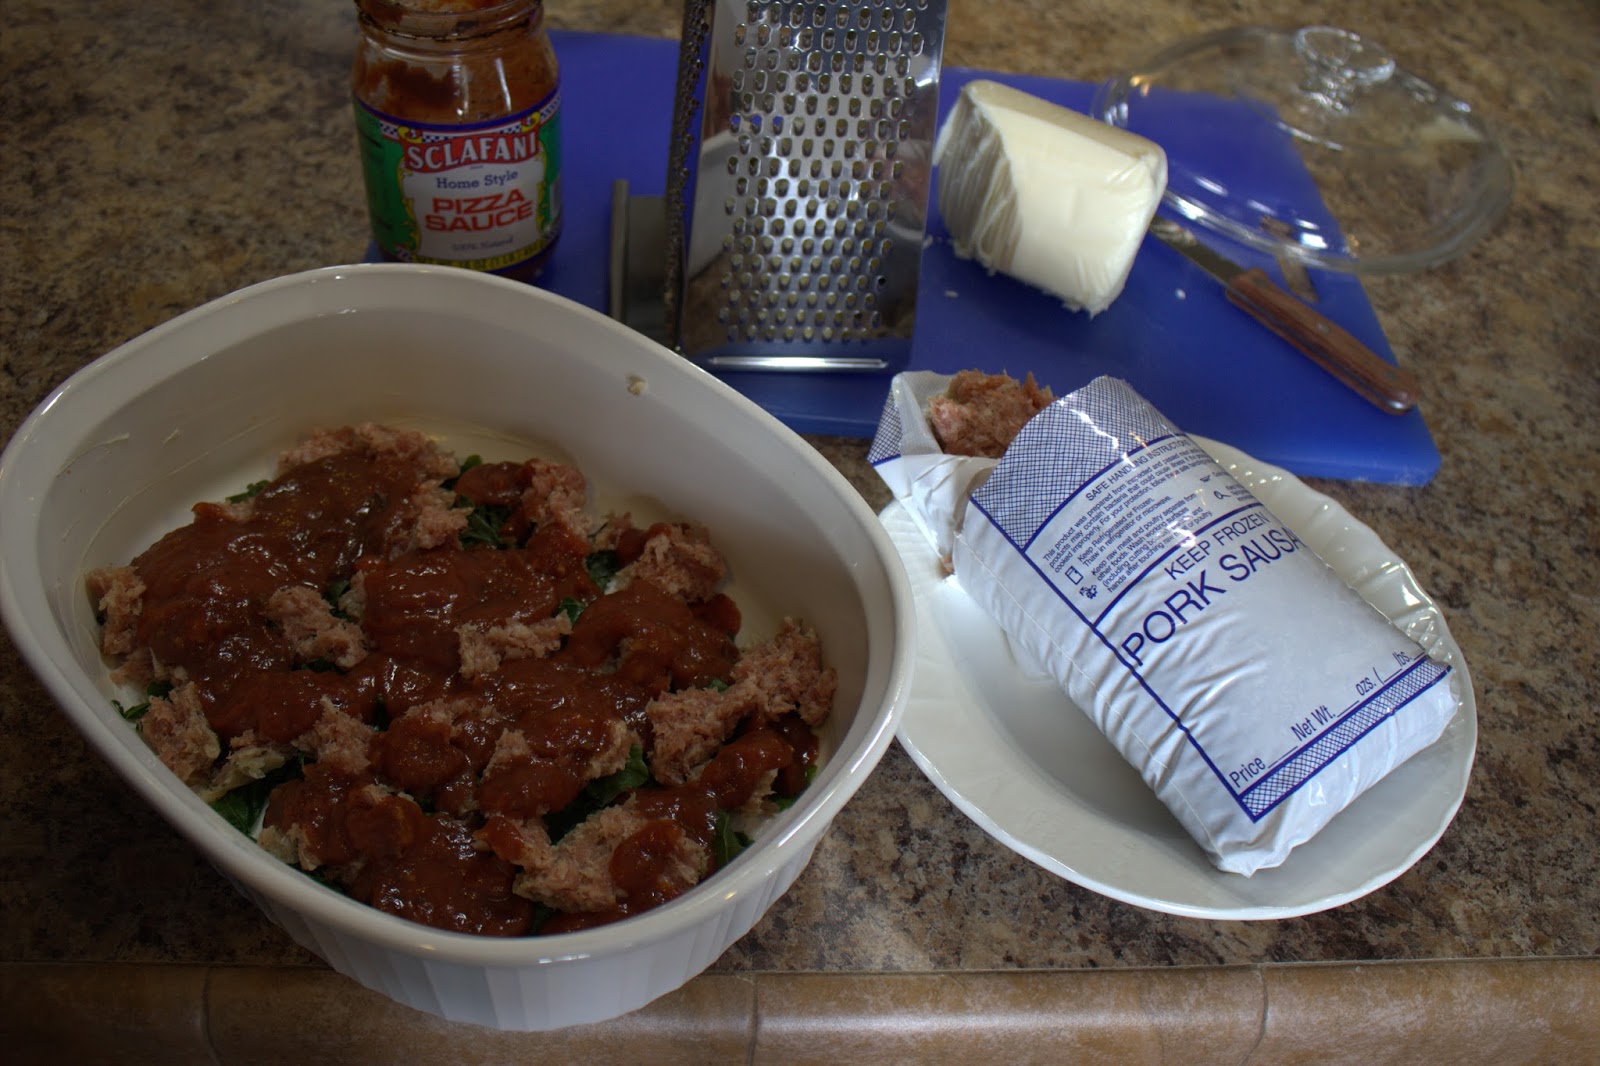
  8. Pinch off pieces of sausage and layer them around the baking dish. If you know the variety of sausage you are buying is greasy, you probably want to brown the sausage first and drain off the fat. Then proceed with this recipe using browned sausage. For the first time this year, we bought half a hog from the meat-processing plant. If you can do this you will be amazed how much higher quality your pork is. Also, the sausage they make cooks up with no grease in the pan. Call around. You might think, we don't have any meat processing plants where I live, but I used to live in Fairfield County Connecticut, and there was a meat processing plant within half an hour, so don't assume this is not available to you!

  9. Pour about half of pasta or pizza sauce over the pan.
    Use your favorite pasta sauce. I had a jar of Sclafani Pizza Sauce (made in Stamford, CT), which worked really well. If you don't know whether a pasta sauce is "good." read the label. If all the ingredients are ones you would use, it will probably be pretty good.
  10. Layer about half of your mozzarella cheese over the pan.

  11. Repeat with kale, sausage, sauce, and remaining mozzarella cheese.
  12. Sprinkle Parmesan or Romano cheese on top.
  13. Cover and bake 25 minutes. Remove cover and bake an additional 20 minutes until bubbly and slightly browned.


Tomorrow:  Day 2: Disappearing Kale Chips

Friday, May 17, 2013

Spring is Busting Out All Over!

I would have more time to write if our garden weren't doing so well. We have been enjoying fresh greens, onions, and peas from the garden.
Baby Red Russian kale.


Tim on the tractor about to rip rows for the watermelon, cantaloupe, squash, and pumpkins -- the final seeds we are planting this year.

Radishes tell you when they are ready to be picked! The "shoulder" out of the ground.


Baby kale in my beloved salad spinner.

Braised baby kale with tilapia and rice. My photograph does not do it justice. It melted in your mouth with red onions from the garden and garlic.

Sweet peas from the garden. 
Tim teaches me how to crack open a pod of sweet peas. Step one, break off the end that was attached to the plant, but not quite all the way.

Step two, peel back the string that is sealing the two sides of the pod.

Step two continued.

Step three: split the pod.


Step four: eat the delicious peas. These are on the small side, but I was impatient to try my first fresh-from-the-garden peas!
The garden is crawling with lady bugs! How lucky are we!
I guess the ladybugs are a testament to the sustainable gardening practices we use. We are happy to have them because they eat all the other bugs that will eat the plants!

Thursday, April 18, 2013

Tornado Alley (from inside the storm shelter)

Even though I grew up in Illinois, I only once came close enough to a tornado (or had a tornado come close enough to me) to actually see any damage locally from it. When I was in about 4th grade, we were herded into the basement of the grade school as we had been for drills, but we knew this one was for real. Sure enough, the Howard Johnson's roof got torn off only a mile or so from the school.

We had some tornadoes pass last night, and while I am not brave enough to have video to show you, I did get some interesting audio from inside the storm shelter. Now, I may be a coward about tornadoes, by my Oklahoma-born-and-bred husband is not. The tornado warnings kept us in the storm shelter (legitimately) for over an hour. The banging you hear is the hail hitting the storm shelter door. This is what it sounded like, not once, but multiple times:
(There is no video, just audio. Close your eyes for the video of what the inside of a dark storm shelter looks like ;).


Technically, we are just south of "Tornado Alley." According to the Weather Channel, Tulsa is the 6th most dangerous city for tornadoes and Oklahoma City is the 7th, but because it is drier where were we are, we are supposed to miss the worst of it.

Thankfully, there was no damage and no lives lost from this storm locally. The grapevines all survived just fine. The hail was worse north of us.